In the post ‘What is a plugin?‘ you’ve learned what a plugin is, what you can do with it and which basic plugins you should install. In this post we’ll show you how easy it is to install and activate plugins. Once you know what items you want on your site, it’s just a matter of searching the WordPress depository, install and activate the plugins. The next step is to customize the settings to your preferences.
Install a plugin
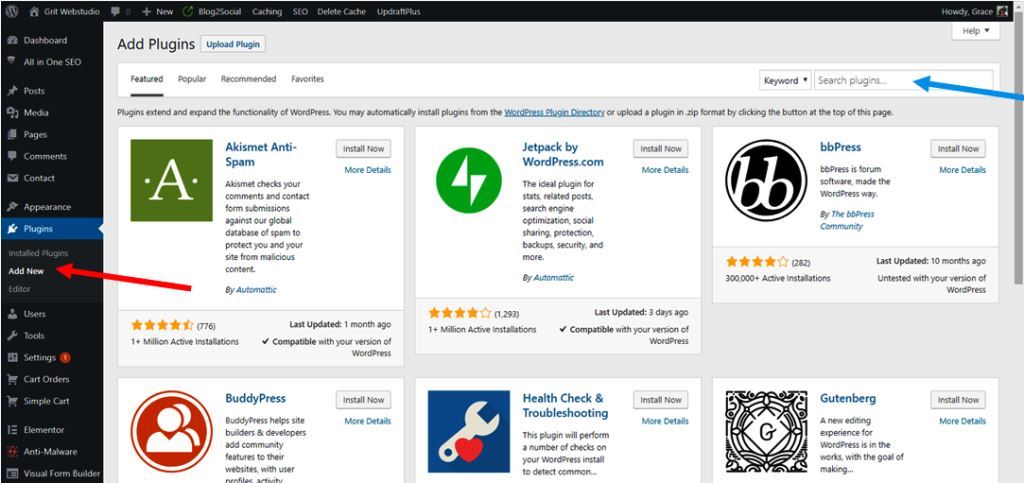
Go to the WordPress Dashboard. Go to Plugins, then click on Add New.
Search for a plugin in the WordPress depository (blue arrow). E.g. by a category like Security.

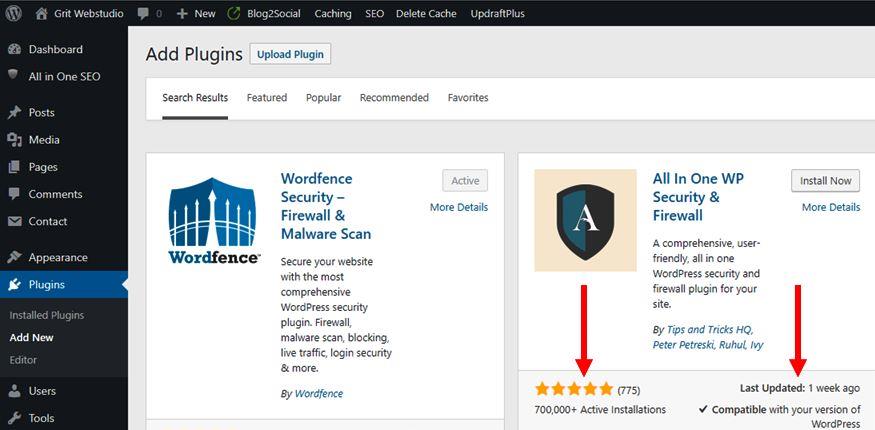
Select a plugin and research it.
Check popularity and if it is kept up to date.

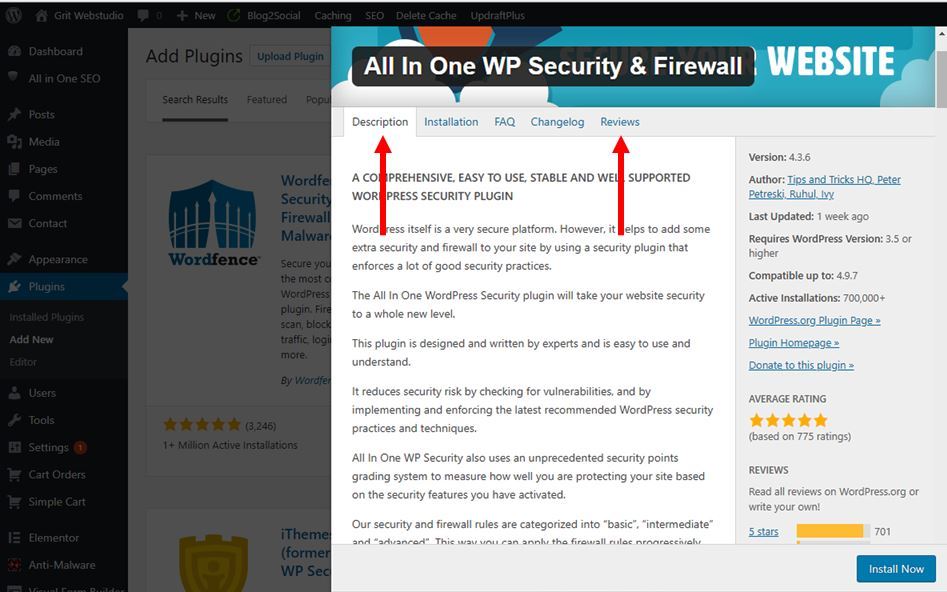
Also check description and reviews.
If it is a good fit for your site, click on Install Now, then click on Activate.

Customize the plugin
Go to Plugins and click on Installed plugins.
Go to the plugin you want to customize, then click on Settings (if available). Don’t forget to save your changes.

Tip:
Update your plugins regularly (=maintenance). Why is this important? To keep your site safe from hackers. Sorry to say, but they just won’t go away. Instead, hackers constantly find holes in open source code which they use to insert their malware and spy bots. It’s a nuisance but we all have to be diligent about keeping them out.
Want to know more about plugins and maintenance?
Read 5 Key steps to maintain your wordpress site or contact us. We are here to help you!
